It seems like lately there are tons of posts out there about making soil blocks, and rightfully so, because they are pretty awesome. Hopefully, we can add a bit to the knowledge pool through our own experience trying them out this year.
For those that aren't familiar with the soil block maker, it's a simple molding tool that creates compressed, self contained blocks of soil complete with dimples on the top to drop seeds in. Ours came from Johnny's Selected Seeds, but there are plenty of places online that carry them.
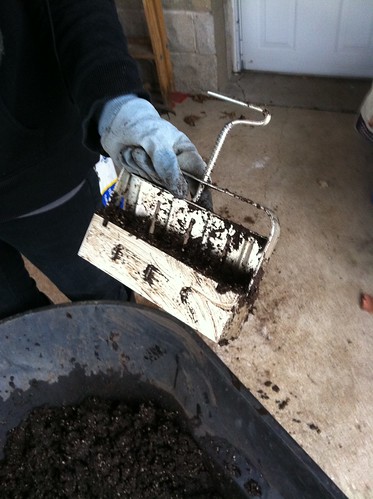 |
| Soil block maker |
Initially, we spent an obscene amount of time reading articles & watching videos on the subject (as we do with most projects ;) before deciding that we wanted to give this a try! Although it is certainly more effort, we're happy we decided to go this route because it provides so many advantages, not just to the plant, but to our pocketbook & the environment as well.
Some of the reasons we chose to use this method include:
- Elimination of root bound transplants
The blocks have a bit of open air between them which allows for air pruning. Basically, the roots reach the edge of the block & stop there instead of twisting around and getting root bound. - Reduced transplant shock
Transplanting is much easier on the plant with this method because there's minimal disturbance to the root system, which gives it a running start once it hits the garden. - Sustainability & Reduced cost
Eliminates waste & the need to buy pots or other containers. When you're starting a large amount of seeds, as we are, it's more economical than buying countless bags of germination mix and biodegradable pots. - Control of your germination mix
Using soil blocks, you can still choose to use a pre-made germination mix. However, after reading the ingredients of many of the affordable mixes, we found most contain only peat moss & perlite with no added nutrients from compost or fertilizer. We chose to mix our own so the seedlings would have plenty of phosphorus, nitrogen & potassium from the start for fast, healthy growth and higher yield.
Front Porch Farm: http://www.youtube.com/watch?v=k2m8-hfhtDU
SF Urban Farmers: http://www.youtube.com/watch?v=PltQYV1oqec
The recipe we're using for our starter mix came from Front Porch Farms (we divided it in half for smaller batches):
SF Urban Farmers: http://www.youtube.com/watch?v=PltQYV1oqec
The recipe we're using for our starter mix came from Front Porch Farms (we divided it in half for smaller batches):
- 5 gallons organic peat moss
- 1/4 cup lime
- 2.5 gallons course perlite
- 2.5 gallons organic compost
- 2.5 gallons water (add more if needed)
- Fertilizer blend: 2 cups blood meal, 2 cups phosphate, 2 cups green sand
 |
| Making soil blocks |
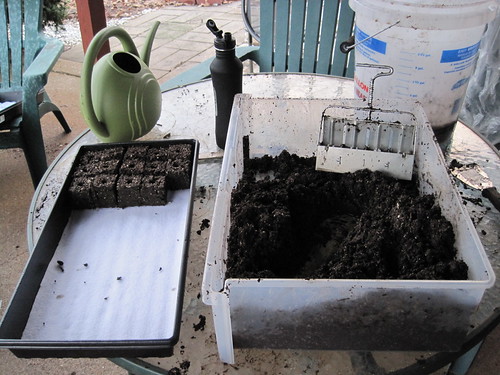 |
| Ready to fill the trays! |
We prefer working with the soil blocks over the peat pellets and small plug flats we used last year. They're easier to move from tray to tray if needed, the dimple for the seed is nicely sized, which makes sowing easier, plus, we can fit more per tray. And they look like little brownies!
We took a cue from Front Porch Farms and also covered our seeds with a bit of vermiculite instead of soil. This helps retain moisture and makes it easy for the little sprout to break through once it's ready to meet the light.
We took a cue from Front Porch Farms and also covered our seeds with a bit of vermiculite instead of soil. This helps retain moisture and makes it easy for the little sprout to break through once it's ready to meet the light.
 |
| Filling the seed simples with vermiculite |
 |
| First four trays ready! |
- Add water to the starter mix gradually
It took a bit for us to get this right. You want it to be about the texture of oatmeal. A good way to judge is to squeeze a handful of soil - some water should come out, but not a ton. - Don't try to make the blocks in a wheelbarrow...
unless you want a serious backache. We found it much easier to move the soil into a small, flat bottomed container & make the blocks at waist height. - Wear a dust mask when adding the perlite & if possible, buy it in bulk
Perlite can cause respiratory irritation and is super dusty, so always better to wear a mask. We also try to buy all these components in bulk to save a bit, but the perlite especially gets expensive in smaller bags. If you're in the St. Louis area, OK Hatchery has a ginormous 4 cubic ft. bag for around $20. (compared to $7 for 8oz at Lowe's) - Use solid bottom seed starting trays
If you plan to start these indoors under lights, we recommend an enclosed tray instead of the open bottomed ones. We found out the hard way that the blocks dry out pretty quickly under lights & misting isn't sufficient to keep them moist. Plus, with our seed starting system, we don't like the idea of water splashing around 500 watts of light fixtures. Not cool. We've since moved everything over to enclosed trays with DIY capillary mats, which we'll probably be posting details about in the near future.
 |
| Lettuce, spinach, chard & kale - started 2.20 |


